Look kewl with GitHub Pages
pages.RmdAim of the Game
What you are looking at right now is a GitHub page. This is a website-like platform I have developed to complement whatever I blabbed about during the Ecolunch talk. Here I have been able to expand on things I did not have time to cover during the talk and add detailed instructions on how to do some cool stuff.
My goal here is to explain how you guys can use this kind of page as a way to develop your research work as well as having an amazing tool to share and present your results. If you want to see an example of someone who does that amazingly check: https://matthieu-bruneaux.gitlab.io/isotracer/
All pages here were made using R markdown in combination with an R package called pkgdown. In this page I’ll explain briefly how R markdown works, how to build a website like this and how to link it to your GitHub repositories so you can apply it to your research.
What is R markdown?
In the simplest way I can put it, R markdown is a type of R document that combines code with text to generate a website-like page (It is very similar to Jupyter Notebook, ask Trevor about that!). This page was made using R markdown and in it I can include chunks of code in between paragraphs that not only show the code used but also the output:
print("BITCONNEEEEEECT!")## [1] "BITCONNEEEEEECT!"
If you, understandably, have no idea WTF is this about check: https://www.youtube.com/watch?v=yIL9wLxG01M".
To create your own R markdown documents (.Rmd) in your R studio session you can go to File-> New File -> R markdown.
I won’t extend too much on how to use it because Xie, Allaire & Grolemund wrote a fantastic free book that will tell you all about it: https://bookdown.org/yihui/rmarkdown/
How to build your website
Let’s say that your paper has a bunch of different analysis you need to explain. For each one, you make an R markdown document explaining it beautifully. It would be cool to have a website compiling all your very important stuff in one place right? Let me show you how to do it through these two very straightforward steps:
Step 1: Create a vignettes folder
Remember when we talked about the elements of your R package? (https://ggcostoya.github.io/cataract/articles/r_packages.html#elements-of-your-r-package-1) To generate a website you will need to create a folder called vignettes where you will store all the .Rmd documents you write.
Step 2: Generate the website
To do so you will need to type the following command on your R console:
pkgdown::build_site()You will see that it takes a while to run but that once it is done the website will pop up. On top of that, two things will appear on your R package folder:
/docs: The functionpkgdown::build_site()transformed all theRmarkdown files from your package’s/vignettesfolder intoHTMLdocuments (HTMLis another programming language, just likeR, in which most websites are written). All theseHTMLdocuments are stored in the\docsfolder. My advice: best not to touch it unless you know what you are doing!_pkgdown.yml: This is an extremely important file since it will determine the structure of your website. As a reference for your future projects, I encourage you to check the_pkgodown.ymlfile forcataractwhich you can find in the GitHub repository at: https://github.com/ggcostoya/cataract/blob/master/_pkgdown.yml (Again, so cool to have open source code you can copy and/or get inspired from right?).
Link your website to your GitHub repository
Now that you have the website it would be even cooler if you could share it with people right? You could use it to present the supplementary materials of your papers, share and explain your progress to colleges or even use it as promotion material for yourself! Let’s see how you can do that, again, in steps:
Step 1: Remove the /docs folder from your .gitignore file
When you created your package one of the files you generated was .gitignore, which is used to indicate files or documents that should not be tracked by GIT. You will see that the \docs folder is there now. We don’t want it! Erase it from .gitignore.
Step 2: Tell GitHub where to look for your website
By now you should have a GitHub repository linked to your R package, now we want to tell GitHub to look in the /docs folder to generate a website. There are many ways to do this, most of them much more elegant than this, but this is how I do it:
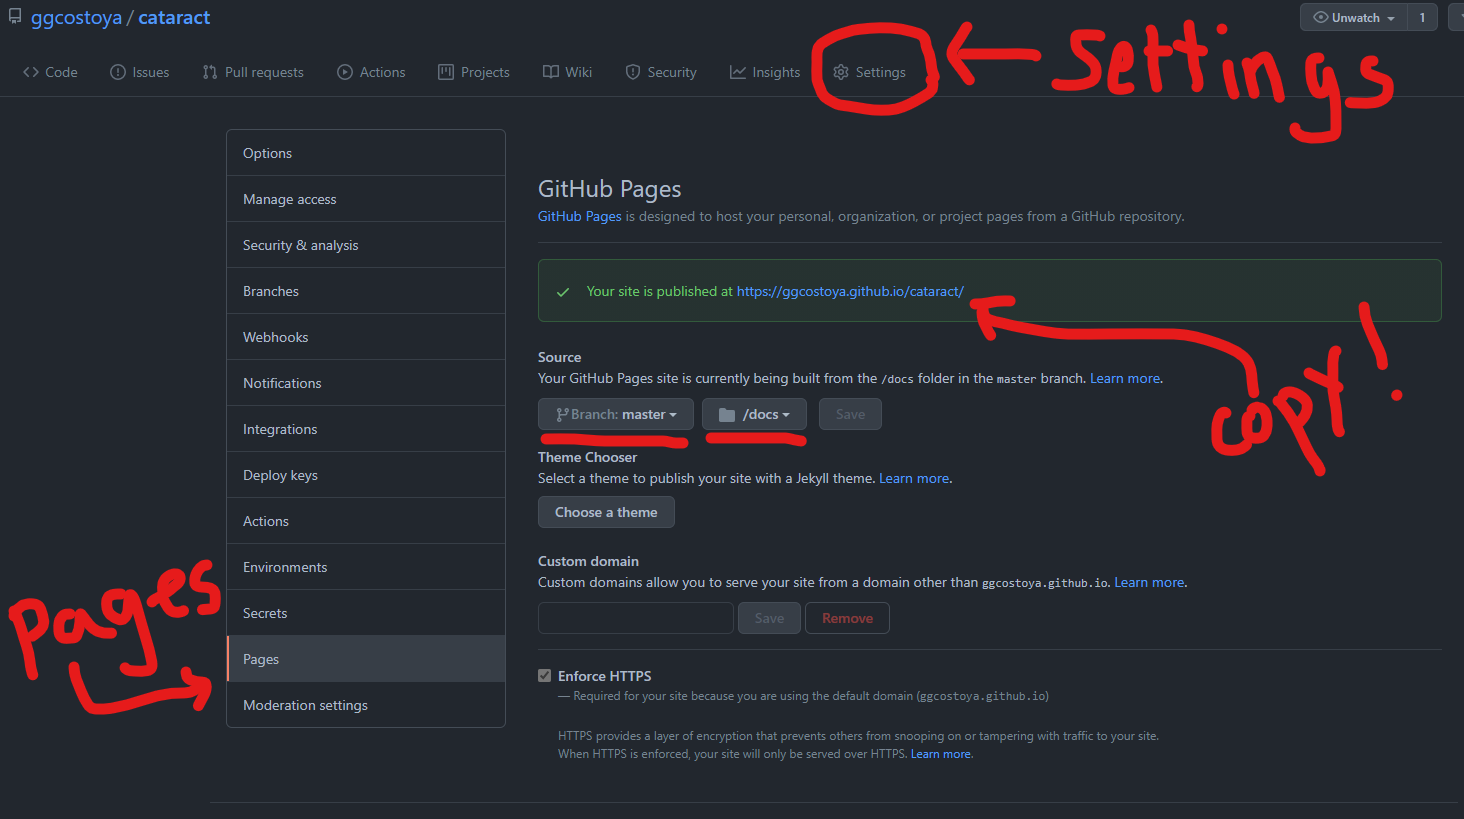
Within your repository open Settings -> Pages. There you will have the option to determine the Source. You want to select your master branch and your /docs folder (shown below). Save your changes and a message claiming that Your site is published at bla bla bla should appear. Copy the link for your website.

Step 3: Add your website link to the GitHub Repository Description
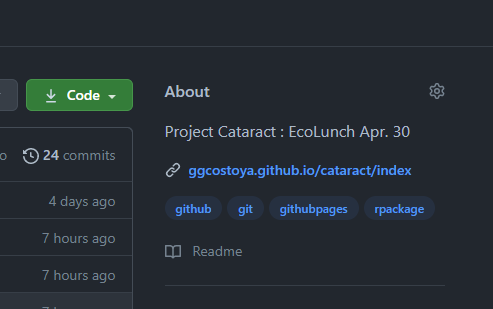
If you go back to the main page of your GitHub repository (<> Code) you will see that in the right hand side there is a section called About. To change it click on the gear symbol on the top right

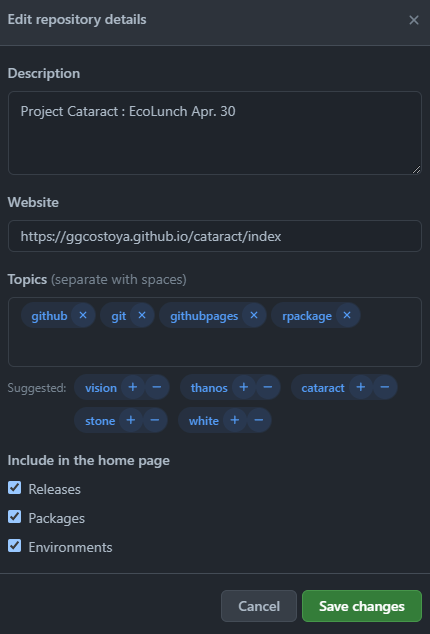
That will open a page where you can write a description of your repository, add some topics and paste a link to a website. That’s where you’ll paste what you copied earlier. Save Changes and you are good to go!
